 OmniImage
OMNIIMAGE GUIDE
How to Convert PNG to JPG on Mac
Convert one or many PNG files to JPG locally on Mac, with clear format choices and automatic handling for transparency.
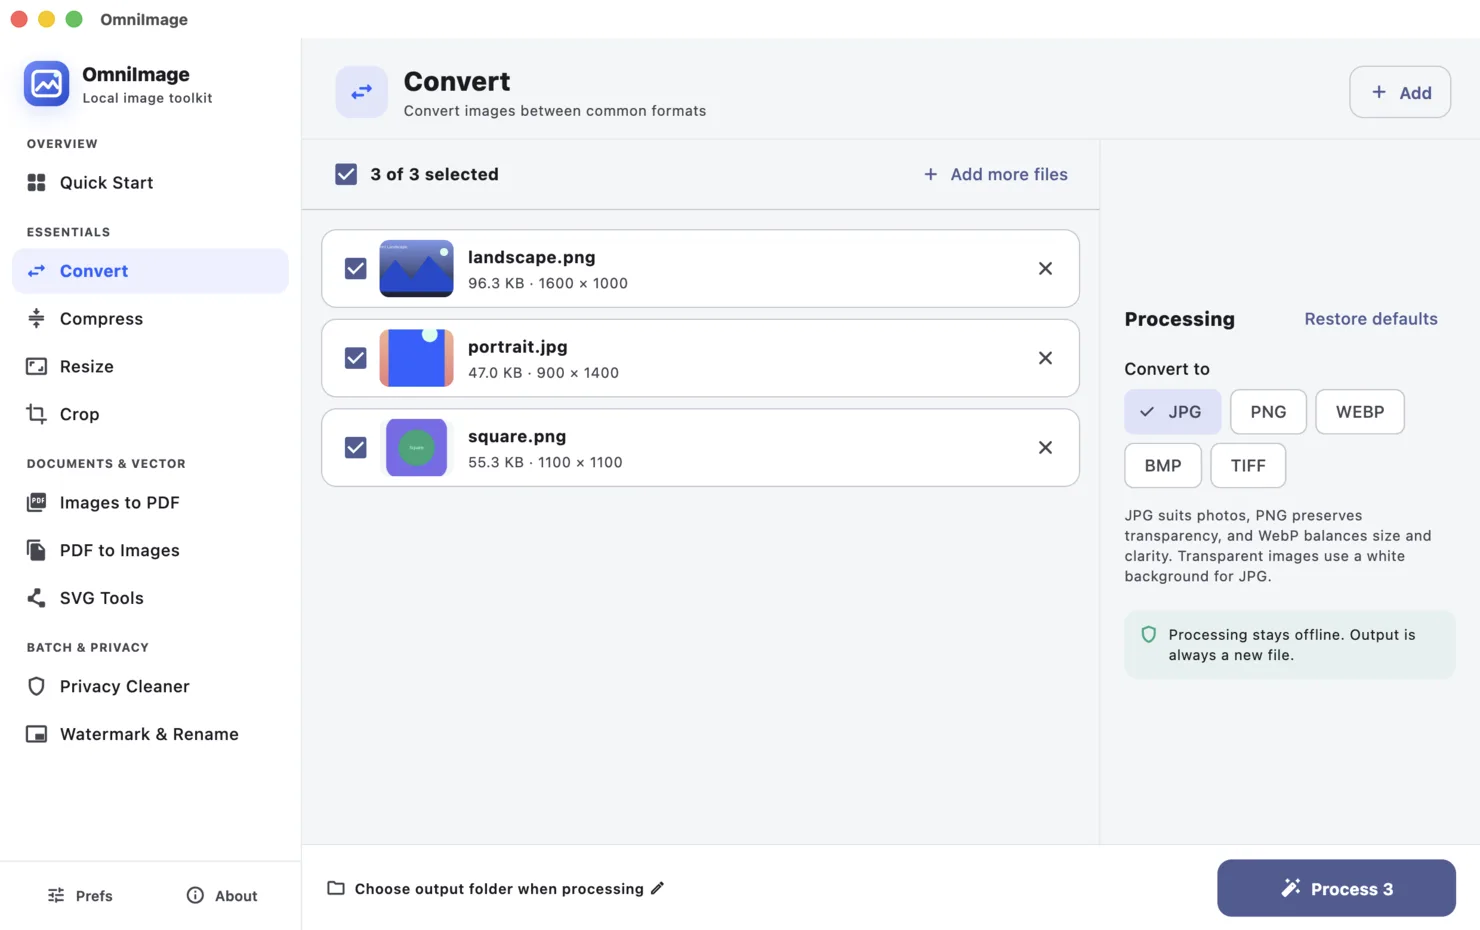
To convert PNG to JPG on Mac, open Format Convert in OmniImage, add the PNG files, select JPG, choose an output folder, and process the batch. Because JPG does not support transparency, transparent areas are placed on a solid background instead of becoming unpredictable.
STEP BY STEP
- 1
Open Format Convert
Select Format Convert and add the PNG files you want to change. Files with different dimensions can be processed together.
- 2
Choose JPG
Select JPG as the output format. OmniImage explains the practical difference between JPG, PNG, and WebP instead of asking for unnecessary settings.
- 3
Check transparency
If a PNG contains transparent pixels, remember that JPG cannot preserve them. Use a suitable solid background, or keep PNG when transparency is required.
- 4
Choose the destination and process
Select where the new images should be saved. The output uses new filenames and the PNG originals stay unchanged.
Choose the right approach
Choose JPG
Best for photographs and broadly compatible sharing when transparency is not needed.
Keep PNG
Best for transparency, interface assets, diagrams, and screenshots that need crisp edges.
Choose WebP
Useful when you want modern web delivery with a strong balance of size, detail, and transparency support.
Conversion changes the container, not the subject
Converting a format does not create missing detail. A small or blurry PNG remains small or blurry after becoming JPG.
For a website, choose the format based on content: JPG for photos, PNG for transparency and sharp graphics, and WebP when browser delivery is the priority.
Common questions
Can I convert several PNG files at once?
Yes. Add the files together, select JPG once, and process the selected batch.
Will the original PNG files be overwritten?
No. OmniImage creates new output files and leaves the originals unchanged.