 OmniImage
OMNIIMAGE GUIDE
How to Convert Images to One PDF on Mac
Arrange JPG, PNG, and other images in the right order and turn them into a shareable PDF on your Mac.
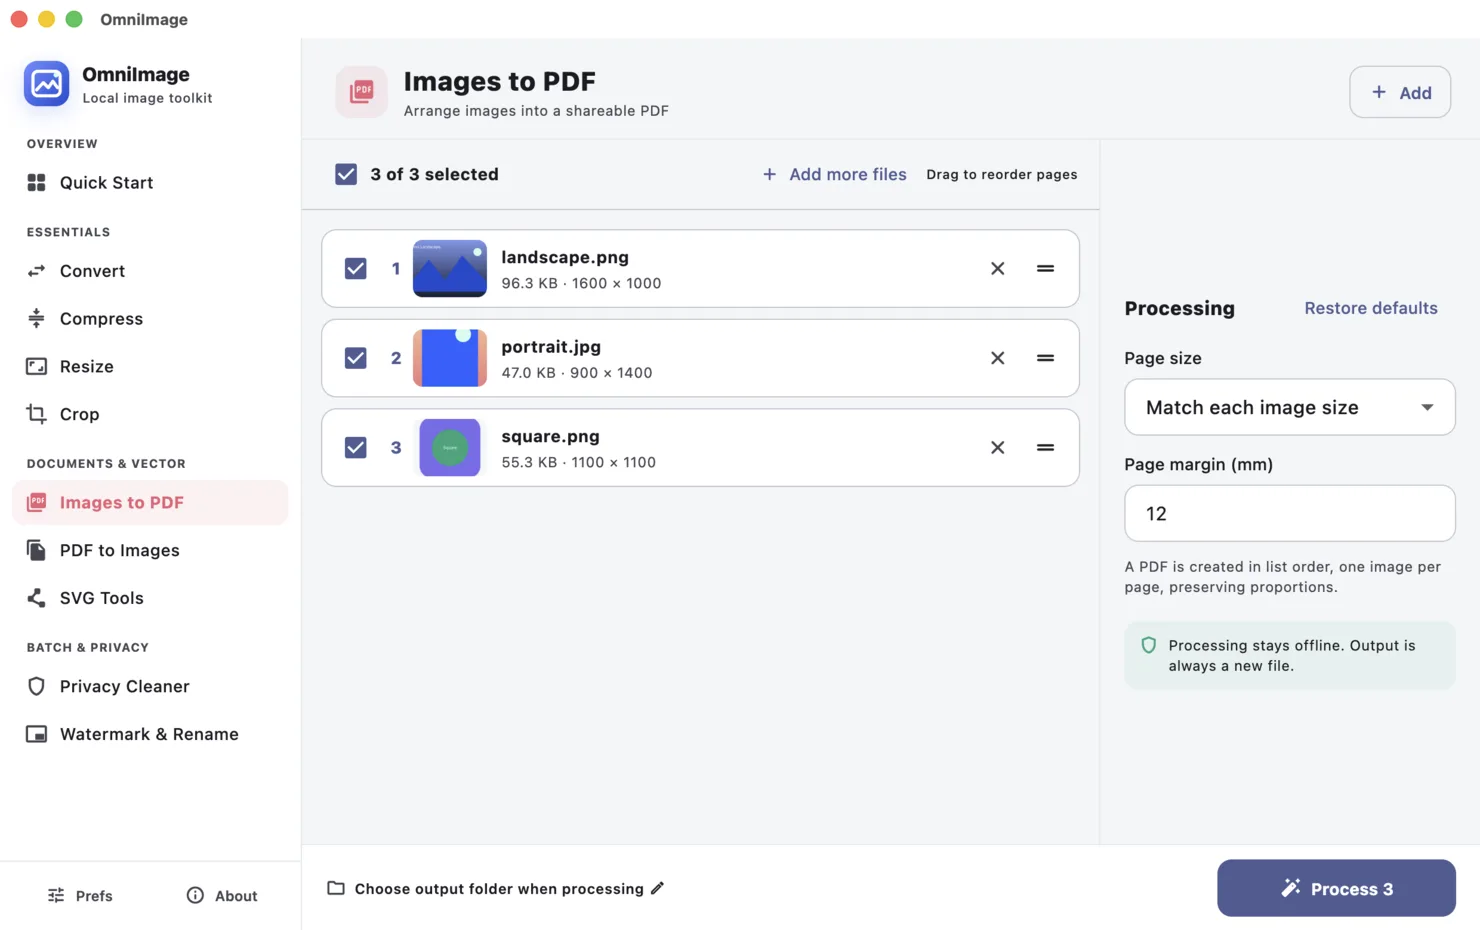
To combine images into one PDF on Mac, open Images to PDF in OmniImage, add the images, drag them into the required page order, choose the page-size behavior and margin, then create the PDF. Each selected image becomes a page while its aspect ratio is preserved.
STEP BY STEP
- 1
Add the images
Open Images to PDF and add the files for the document. Mixed image sizes and orientations can be used together.
- 2
Put pages in order
Drag rows into the correct sequence. The list order is the final PDF page order, so check it before processing.
- 3
Choose page sizing
Fit each page to its image when natural dimensions matter, or choose a consistent paper size when the PDF will be printed or presented uniformly.
- 4
Set the margin and create
Choose a practical page margin, select an output folder, and create the PDF. The source images are not changed.
Choose the right approach
Fit each image
Useful for scans, artwork, and mixed orientations when avoiding unnecessary borders is the priority.
Use a paper size
Useful for documents intended for A4 or Letter printing and predictable page dimensions.
Keep a margin
A small margin prevents content from touching the page edge and is safer for home or office printers.
Page order is part of the document
A PDF is easier to share when the order is deliberate. Rename or review images first if filenames do not reflect the intended sequence.
Very tall or wide images may leave empty space on a fixed paper size. This is expected when preserving the original proportions without cropping.
Common questions
Can portrait and landscape images be mixed?
Yes. OmniImage preserves each image's proportions and applies the page-size choice to every page.
Does the PDF upload anywhere?
No. The PDF is assembled locally on your Mac and saved to the folder you choose.