 OmniAudio
OMNIAUDIO GUIDE
How to Compress Audio on Mac Without Unnecessary Format Changes
Audio compression is useful when a recording is too large to email, upload, archive, or transfer. The important choice is the balance between size and listening quality.
Updated: 2026-08-01 · 7 min read
Quick answer
Choose Compress audio, add a file, select a size-and-quality preset, and export. OmniAudio keeps the original format by default, so an MP3 normally remains an MP3 and an M4A remains an M4A.
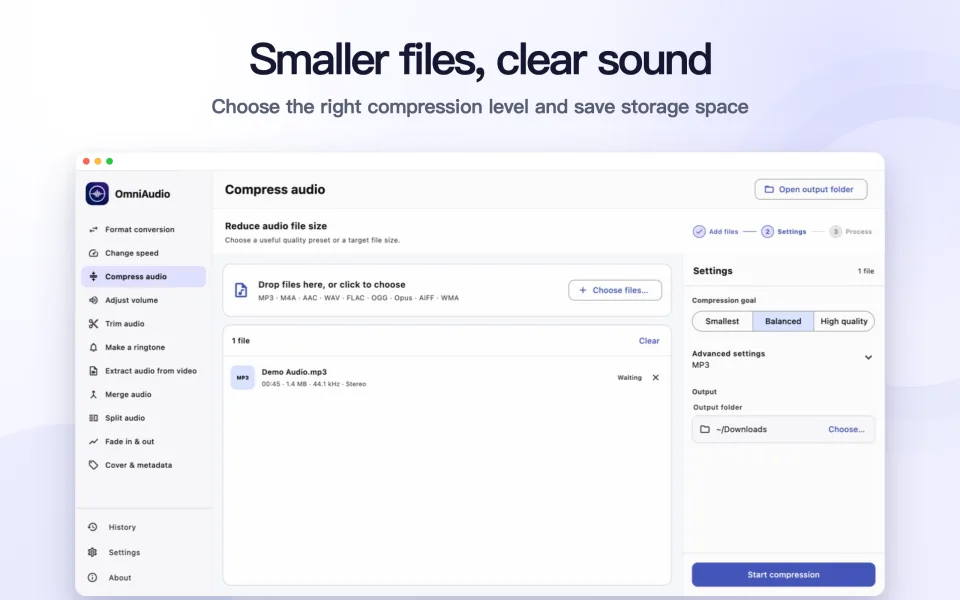
Step by step
Open Compress audio
Select Compress audio in the OmniAudio sidebar.
Add the file
Drag in an MP3, M4A, WAV, FLAC, OGG, Opus, AIFF, AAC, or WMA file.
Choose a compression goal
Balanced is a practical starting point. Choose Smaller file for speech or strict upload limits, or Higher quality when sound matters more than size.
Leave the format unchanged
The source format is retained by default. Format controls remain available under Advanced settings when a deliberate change is needed.
Compress and compare
Export the result, listen to a representative section, and compare its size with the original before deleting anything.
Good to know
Avoid repeated lossy compression
Repeatedly compressing MP3, AAC, OGG, Opus, or WMA can accumulate audible artifacts. Work from the best source you have.
Lossless files behave differently
WAV, AIFF, FLAC, and ALAC can be large. If the destination accepts a modern lossy format, a deliberate conversion can reduce size much further.
Common questions
Why is the compressed file not much smaller?
The source may already use a low bitrate, or the selected preset may prioritize quality. Try a smaller preset and compare again.
Will compression replace my original?
No. Normal processing creates a new output file in the folder you choose.